Showing posts with label builder. Show all posts

Monday, June 11, 2012

More than Monday - It's A Little Kitchen Chit-Chat Day!


Things are moving along - I'm sure it's a little slower pace than some remodeling jobs (but faster than others i've heard about) but that is because hubby & I are doing some of the work to keep our dream kitchen within our budget. As you can see we have all the patching & priming done now...


Hubby did such a wonderful job on the soffits - they were in really bad shape. 


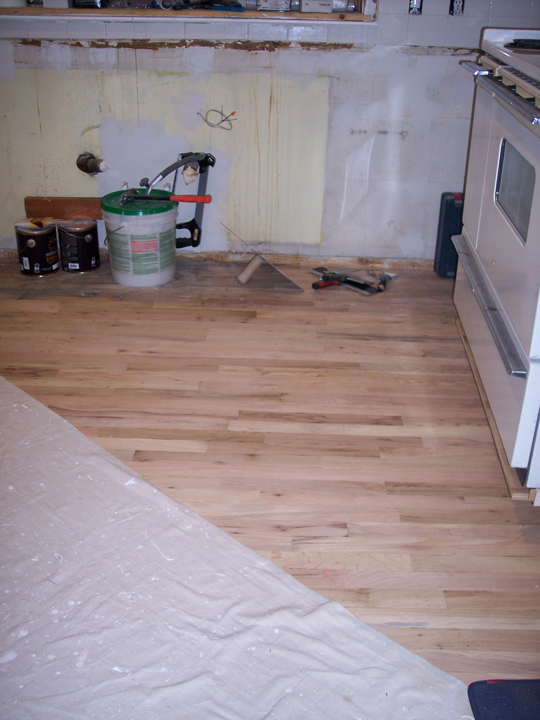
1.) Paul put the first Coat of Floor Sealer


2.) Second Coat of Floor Sealer / 3 More to go after the cabinets & stub walls are installed. ( check out hubby's fabo soffit work - he's da man!)


3.) This is a close up of the Historic Pewabic Tile Install I did in 1999

AND ENDING ON A HIGH NOTE THE STUB WALLS & FIRST OF THE CABINETS ARE SCHEDULED TO GO IN TODAY...THEN I GET TO START THE TILE WORK!!!


Tuesday, June 5, 2012

A Little Kitchen Chit-Chat

Well it's been a bit since we looked at the kitchen remodel progress and a big part of that is because scraping a kitchen floor is a LOT of work. We removed the 3 layers of tile and were faced with 50+ year old hardened glue that was covered in green tile backing paper! 

Thankfully, Paul the builder we're working with was willing to help us take on this challenge and made things happen.


So now we're at the patching/primer stage of the project. The patching should be complete later today or tomorrow...then we prime the walls, ceilings & soffits! After that, one more light sanding of the floor and we'll be watching those beautiful 58 year old red oak floor planks come to life with the first of 3 coats of super strength wood floor finish.  

Thursday, May 24, 2012

Kitchen Chit-Chat

We are moving on! Today the electrical, lighting wiring, ceiling fixtures & plumbing have been completed...so that means we're officially moving onto the floor! This is going be a HUGE undertaking because we have to scrap the floor by hands before we can sand...but oh how I'm longing to see those pretty oak floors come back to life after being covered with glue and 3 layers of ugly flooring!!!


Our beautiful new LED lights are in and shinning brightly. They're so soft on the eyes, yet way brighter then our old fixture and 4 of the LED'S use less electricity than just one bulb from the old retina burning fixture we used to have. CHA-CHING on the $$$avings. Paul did tons more wiring to get ready for the overhead sink fixture and the under the cabinet lighting too but it's to hard to show in pics. 


Our beautiful copper plumbing now place behind the wall instead of coming up through the floor...this will add 9" more inches of cabinet space under the sink. Everything Paul is doing is ALL about maximizing every inch of our kitchen. YEAH!!! 


SIDE NOTE: Happy Anniversary Sweetie!!! Thank You for 15 WONDERFUL Years!!! 

Tuesday, May 22, 2012

Kitchen Update

Okay...so we're a little further along now than these pictures show but between work, the remodel and all the other household stuff I'm a wee bit behind. We're still focusing on the electrical - Paul found quite a few issues that had the potential of being really dangerous... so while we're down to the bare bones he is making the necessary repairs! Whew...so glad we're getting this done. Three of the electrical boxes he found were wired incorrectly & had actual solder marks on them from being SO hot... very scary for sure!!! Thank you Lord for protecting our home! So the photos below are from last Friday. We now have LED high efficiency lights in the ceiling and we're wiring for the outlets, overhead sink task light and under the cabinet lighting today! (we took yesterday off) 

ALL THE CABINETS ARE GONE...DOWN TO BARE BONES!


THE HOLES FOR 4 NEW LED HIGH EFFICIENCY LIGHTS
(CENTER HOLE WITH BULB IS WHERE THE RETINA BURNING FIXTURE WAS 
IT WILL BE CAPPED OFF AND PATCHED)

 HUBBY & I DECIDED WE'RE GOING TO
REDO THE LANDING AND STAIRCASE TOO
SO THAT THE JOB IS COMPLETE.
THIS MEAN NEW STONE TILE LANDING & RED OAK
STAIR TREADS DOWN TO THE BASEMENT.


Thursday, May 17, 2012

A Little Kitchen Chit-Chat

Well the kitchen remodeling is officially under way. Paul Rochon, the builder & designer  I mentioned in the last post started our work on Tuesday at 9:00am sharp. He was happy to see we had done our homework, packing everything in the kitchen up and for extra credit ripping out the old kitchen floor. He was able to get right into stripping everything down to the bare bones. Pictures of that will be coming soon. After the first post about our kitchen remodel a couple people sent me emails saying the kitchen didn't look in that bad of shape, just a little outdated, (which was nice to hear but it just goes to show pictures really can be deceiving)....so I thought it would be fun to take a closer look today at just how bad it really was.


CLOSE UPS OF THE THINGS I DON'T LIKE ABOUT MY KITCHEN PART #2
1.) Goodbye to cabinet doors that pop open & vibrate when the dishwasher is running. 

2.) Goodbye to drawers that won't close all the way anymore. 

3.) Super jagged edges on the tile that I cut manually before I knew what a wet saw was. Lots of ripped clothing from those edges over the years and the face of this under sink cabinet is broken & pushes in when you lean on it while doing anything at the sink. 
4.) Plywood shelving in one of our cupboards to replace the ones that fell apart. You can see how the whole cabinet is totally falling apart. lovely isn't it. (and for anyone who is wondering...yes that is a "ninja" blender. it's a great kitchen tool we love it.)  

5.) The bottom of the drawer above rubs on the cabinet body & drops lovely little wood chip shavings into this cabinet below...so yes I have to wash my dishes twice...once before they go into the cabinet & once before I can  use them. I wipe up the little chips everyday but by the time i'm done preparing a meal it looks like this all over again. I can't wait to see how much we save on our water bill. 

6.) I'm sure at one time, like back in 1954 this was considered functional corner cabinet space...but sorry when hubby or i have to get down on all 4's and squeeze & twist into and 11" opening just to get to a pan or a bowl it's time for a change. 

7.) I can't wait to get rid of this retina burning light fixture. We're replacing it with sleek new LED recessed light fixtures. 

8.) Stuff everywhere and nothing fits because of poorly designed cabinets & pantry. It's wonderful to think that in our newly designed kitchen there will be a place for everything with room to spare. 

9.) Hubby doing what he love to do...tear thing apart! SHHhhhhhh......He doesn't know I photoshoped Demo-Man on his shirt. 

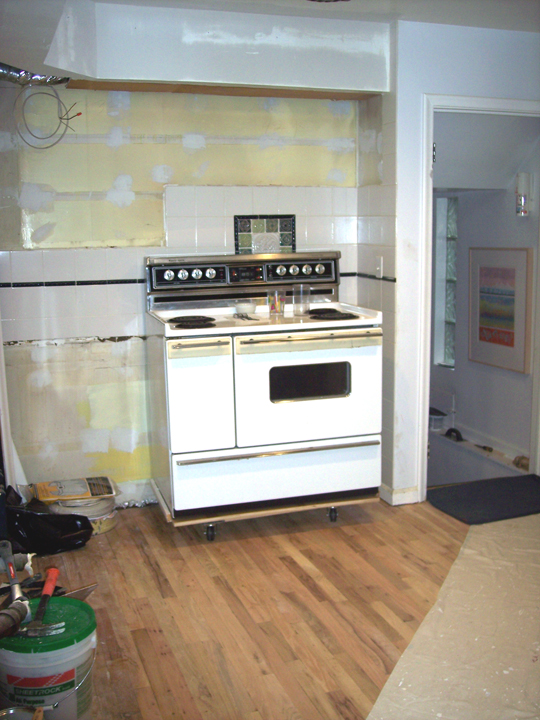
10.) 3 Layer of ugly plastic flooring covering up what will be our "new" fabulous oak wood kitchen floor...with lots of sanding and a little TLC. 

11.) TA-DA...just gotta get under the stove & fridge. 

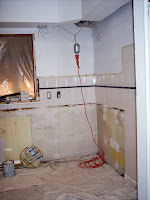
12.) Construction has officially begun....Please take everything including the kitchen sink!!! 

___________________________________________________________________

I'll be back with more photos as the project moves along...until then if you are looking for a really talented & trustworthy builder/designer for any type of project...from a remodel, additions, furniture or even a new home we would highly recommend you consider working with Paul Rochon, Inc. He has done projects large & small for clients all over the country.  


Monday, May 14, 2012

More than Monday

Today is a really exciting post...today I'm going to start documenting my kitchen redo project! For years this project has been a dream. When my hubby & I bought our home in 1999 I knew immediately something had to be done about the kitchen. We had put almost every penny we had saved into purchasing our home and that left NOTHING for a kitchen remodel...but I knew living with flowered wall paper and yellow/brown wood cabinets would drive me insane. So I did what any desperate person does....they do it themselves. Now I have to say on an $1,100.00 dollar budget i made MAGIC happen. I tore down the wall paper and tiled the backsplash, countertops, behind the stove and a couple of walls. I refinished the wood cabinets with distressed paint technique (that I had never done before, & it turned out pretty darn good if I say so myself) and painted the remaining wall surfaces shades of ice blue & white & deep navy. It looked really great, bright, clean & more updated. The cabinets were in structurally rough shape even back then and now 13 years later I've done my time in this bandaged up kitchen and it's time for a professional facelift. I'll be posting photos & updates as we go through the process of taking our 1954 kitchen with a little 1999 makeover into a 2012 dream space. The MOST IMPORTANT detail about this whole story is the very unique & wonderful designer/builder we are working with on this remodel. He is a top notch cabinet maker. EVERYTHING is made by hand and no detail is too small. No cookie cutter stuff with this guy. Everything is being designed & made, not to fit our space BUT to fit AND maximize our space perfectly! This is a dream come true. What makes this builder so unique is the fact that he is willing to work with us, using the things we can do in the labor arena to help offset our tight budget. I have worked with enough contractors over the years to know they prefer it when you're not around...not this guy! If you want to get your hands a little dirty to help keep costs down he's good with that and if you'd rather sit back and watch the magic unfold he can make that happen too. We are thrilled to be working with such a talented, honest & sincere businessman. So here we go... the first "Kitchen Remodel" blog entry. The break down of the kitchen started last Thursday but before we go there I want to show you how the kitchen looked before hand.
There is a whole laundry list of things I don't like about my kitchen but these are what stands out in these photos.